Tuesday, January 31, 2012

Home projects list: January update

Recently I shared my home projects list with you. Still can't believe you guys managed to read through that. All the way. Amazing.

Well, I thought I should honor that and post and update today. Don't worry, I'm not going to post a giant list again with two things crossed off. I've updated the list and will share my progress only. Looking at what's done is much nicer anyway.

So here we go.

First up is my home office. My new Ikea Helmer units, that I got as a Christmas present from my mother in law, are now home to countless craft materials and I have three drawers dedicated to sewing supplies. Still no solution for the fabric stash, but we agreed we're focussing on the good things, right? Right. So the good news is I can now just turn on my sewing machine and have supplies like measuring tape, pins and thread within easy reach. Loooove it. Much nicer than having to drag it all out from the hallway closet!


One day I also grabbed a couple of nails and big brother's (!) wooden hammer and hung a few pieces above my desk. I'm sure there's a much more professional way of doing it, but at this point I prefer wooden hammers, eyeballing it and just getting it done to it sitting on my list any longer. I hung two of Heather's gorgeous cat prints , a small painting that my mom got as a gift when she was young and that somehow survived all those moves and purgings, a woven something that I liked the shape of but have forgotten where it came from or what it was supposed to be used for (some sort of packaging I suspect), and little brother's foot and hand prints that he did in Kindergarten. The I stuck two owl wall stickers that my love got me Christmas (we're talking 2010 here, mind you. They can be found here, btw) to one side of the shelf, stepped back and felt immensely pleased with myself.


On to the kids' rooms. Once I managed to get big brother's hammer and a box of nails out of the shed without being struck by a tower of stuff collapsing on me, I figured I could just as well make the most of it. So while the kids played peacefully (well, as peaceful as an almost-three-year-old will play without a nap), I scanned a few pages of little brother's favorite book. It's ancient - I remember reading this as a kid. My German readers might remember the little nameless boy who badly wants an elephant whom he will call Theodor? Anyhow, little brother helped me select the pages he liked best and we printed three double pages on one sheet of paper and framed it in a simple (and lightweight non-glass ) frame. Then we framed another two of Heather's cats and the boys helped me find the perfect spots above their beds for their new art.


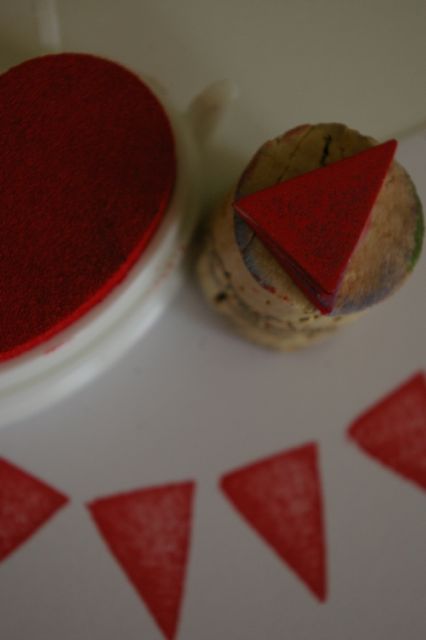
While I was at it, I finally made simple templates one morning, printed them out, traced onto cardboard and wrapped red yarn leftover from Greta's wreath (you should've see me squeal, hop up and down and turn as red as the yarn when she posted that!) around them.

I've seen this on a blog. It looked great. One of those ideas you pin, bookmark and/or file because it looks simple enough to copy. Well, turns out I should have named my kids Oliver and Bruno maybe. But nothing that starts with an M or an H. Ugh. One of those things I should have thought through all the way. Because you can't just wrap these letters, no, you have to figure out a way to get to all sides and around all corners. Hmmm... In the end it worked out somehow. It's not perfect and far from something to post a tutorial about. BUT, you see, I've had the image of these letters wrapped in red yarn and hanging on the walls above their beds in my head for so long now that I didn't really care if they were perfect or not. They're red, the thick yarn is gorgeous and if you don't look closely they're cute. Oh, and I hung them by simply hammering a nail right through the cardboard. So professional.


So that's the update for January. Oh, and my sweet husband oiled the wooden countertops in the kitchen, so that can also be crossed off the list. Yay!

And no, I'm not counting how many more to go. But it felt soooo good to cross them off the list and I smile every time I look at the art above my desk or in the kids rooms.

Cheers,
Swenja

Sunday, January 29, 2012

{the simple things} Meow


I know I posted photos of my cat before. But I can't help it, he's just so cute. And unlike my other cats, he seems to love the camera.

Trying some in b&w again today.


cleaning up those muddy paws

still wet but a lot cleaner already...

sometimes his nose is bright pink, sometimes more pastel colored


I do believe there is something else living in this cat. The way he looks at me, he can't be "just" a cat.

Linking with Rebecca over at the simple things sunday. Yay for one month of simple things completed! Can't wait to share more next month.


Happy Sunday,
Swenja

Saturday, January 28, 2012

Simple DIY bunting stamp

There are a million great tutorials out there on how to make stamps, and one day I'd really like to try some of them.

Meanwhile, we have quite a few birthdays coming up, and I needed something now to make simple birthday cards. So if you have five minutes, some craft foam (Germany: Moosgummi. You know, that stuff in the kids craft set you never use because the colors are so ugly), a cork, scissors and some glue, you could do the same.


Just cut out a longish triangle for your bunting out of the craft foam. I actually did several to use with different colors ink without having to always clean the stamp. Glue two of each together to make the stamp a bit higher, then glue that sandwiched triangle to a cork or piece of cork. Let dry.

That was easy, now wasn't it? So, now add your bunting triangles one by one, let dry and draw some string by hand.


The BBQ grill stamp I bought here (one of my favorite shops) and the BBQ sauce recipe I posted Friday. I'm planning to do the invitations for little brother's birthday party with the bunting, too. And I got the cutest dog stamp for that. I mean, who am I kidding, I can do a triangle, but a dog? I leave that to the pros! Can't wait to show you.

For now I'm off to bake cakes, clean the house and do general birthday party preparations.

Happy stamping & have a great weekend,
Swenja

Friday, January 27, 2012

{kid craft} Watercolor bunting

We have some birthdays coming up this weekend. And you know there's no birthday party without at least a little bit of decoration. Preferably homemade. So when Rebecca posted her pretty patterned hearts for Valentine's day last week, I knew we had to do something like it. Except we were going to make regular bunting instead of hearts.


We got some new watercolors. Serious watercolors. Not the cheap kind that looks pastel. Nope, we needed the bright ones.


So little brother set right to work. The concept of using just one or two colors so it would look pretty and match decorations did not really appeal to him. Sigh. Sometimes I'd like to "art direct" and tell them what to do so I can have a pretty result. But in the end, we're doing crafts for them and for their creativity. So I let him do whatever he wanted and ended up saving the picture for daddy as a present.

Getting those brushes clean.


Big brother also needed to try all the colors first. Oh well.


Eventually though he decided to help me out as I had started to make simple, monochromatic patterns. No idea if he thought it was fun or if I just looked desperate.


But we ended up with quite a few sheets. We did some in red and some in blue to use for different decorations.


Since I try to keep little brother off naps in order to have some quiet time at night (and not a wide awake toddler running around at 10pm), his attention span is about a nanosecond. He quickly got bored with the watercolors and switched to cutting things up. He loves cutting things up. I usually choose not to look to closely because he cuts the paper in teeny tiny bits and then goes on to cut those. No way I would have let big brother handle scissors like that at that age. But if I ever want to get any of these weekly projects done, I have no choice but to let little brother cut up paper to make mail for mommy. And he's really good at it, even without a nap.


The next day, we cut them up using my slightly crooked trusted template. We? Well, mostly me. Big brother helped a little.


It was already getting dark by the time we had taken a break for some fresh air and finished cutting and stringing them onto white twine.


Blue ones and red ones. I love the red ones.


But the blue looks good for tomorrow's Bavaria themed party.


Oh, and then big brother really got into it and made some bunting for his doll. Little brother also loved cutting up the scraps. And cut some more. 


I still haven't cleaned the house and the cakes aren't done yet, but at least my presents are wrapped and the decorations are up!

Have a good weekend,
Swenja

Homemade BBQ Sauce

Yeah, I know. BBQ sauce in the middle of winter? I usually make this in the summer, but never got around to posting it. But lately I've been making quite a few batches as birthday gifts, and so I thought I'd share my version of it.

It started with a BBQ sauce that my husband loved and we bought several bottles of each summer. Of course it had to be imported from the States, and that meant it had quite a price tag. Being too busy and broke with the new house to go get any, I started trying out several recipes to make my own version.

I like Emeril's recipe over at Martha Stewart and I still use his Creole seasoning (go here for the recipe), but I decided the BBQ sauce recipe needed some serious tweaking and be allowed more time for the flavors to develop. He adds most of the ingredients (except onions and garlic) at once, but I found that adding them one after the other makes the sauce better. So here it goes:

Homemade BBQ Sauce (adapted from Emeril at Martha Stewart)

1 large yellow onion or 3 regular ones
4 tablespoons olive oil
4-5 cloves of garlic
4-6 tablespoons brown sugar
2 tablespoons cane syrup (or maple syrup, for German readers: Grafschafter)
2 teaspoons mustard (I use Dijon, but the smooth kind)
4 tablespoons cider vinegar (I love Maille's apple cider vinegar)
6 squirts Tabasco
6-8 teaspoons Emeril's Creole Seasoning
900ml ketchup in glass bottles (I buy two bottles with 450ml each)
cayenne pepper or ground chiles to taste (optional)
smoke salt (I use Spice Island's Hickory salt), about 1-3 teaspoons, to taste (optional)


Heat oil in medium sized pot. Finely chop onion and sauté over medium heat. Don't rush this. It takes a while. Your onion needs to be really soft, translucent and just beginning to brown. Then add garlic and briefly sauté.

Now, add the following ingredients one after the other, and let the mixture come back to a bubble before adding the next ingredient. The sugar takes the longest as you really want this to dissolve and brown a bit. So, add sugar, syrup, mustard, vinegar, Tabasco and seasoning. Finish with ketchup. Taste the sauce and adjust if you like it spicer. But remember that the flavors develop when simmered.

Let the sauce cook over low heat for a while, at least 15 minutes and as long as 45 minutes. Use a splatter guard and stir every once in a while.

Meanwhile rinse your ketchup bottles and soak to get the labels off. Clean with hot water and set aside. Taste your sauce and adjust seasonings. Add smoke salt if using.

Use a funnel to fill the hot sauce in your bottles and close caps immediately. Stored in the fridge, it lasts several weeks. And makes a pretty gift, too. Which is why you make a batch with two bottles. Same work, more out of it.


Oh, and that pretty stamp is from here. For this gift, I also made a large batch (four times the recipe) of the Creole seasoning so I'd have some to give along with the sauce.

I also used the stamp to make a birthday card. As for the bunting - that's a homemade stamp. But that's a different post!


What's your favorite sauce for grilling?

Cheers,
Swenja

Wednesday, January 25, 2012

Little brother's new coffeemaker

It'll be little brother's birthday soon. Well, in March actually, but to me that's soon. So I've been looking for gifts. He loves his play kitchen and makes coffee in it for me every day. It's a great way to keep him busy when you need those last five minutes to finish cooking dinner or talk on the phone: "Sweetie, could you make mommy a cup of coffee, please?". He runs off and makes all sorts of noises in his kitchen, then comes back with one of those ugly blue plastic cups from a sandbox play set.

So look what I got:

Isn't it gorgeous? I'm so excited. Crazy, I know. I thought he could use a coffeemaker. Not one of those traditional ones though, he wouldn't know what it is.

He needs something more like an espresso machine. Of course those are available in children's sizes, too.

Modeled after the leading brands. Of course.

And they blink and beep and make all sorts of noises. Of course.

But then I saw this one. It doesn't make a sound. It has no blinking buttons to press. No water tank. No plastic.

You see, little brother loves pretending. He can pretend there's a coffeemaker where there is nothing. So I'm sure he can pretend this one makes noises, too. And I don't want him to lose that ability.


Besides, it just looks cool. It's all solid wood (even the cup and spoon). And it just fits perfectly in their play kitchen:


Oh, and did I mention it was not even 6 EUR? (pssst, it's on sale at here)

Now I want a cup of coffee!

Cheers,
Swenja

Sunday, January 22, 2012

Interactive fish and a bionic car - museums have come a long way...


My biggest goal this year is to have more fun with my kids and as a family. I'm making an effort to really sit down and play with my kids (instead of trying to get chores done or quickly checking mails on my phone), do weekly craft projects and do a fun family day trip each month. Since the weather is back to rain and storm here, we went to a natural history museum Saturday. It actually features mostly changing exhibits, so big brother was a little bit disappointed over the lack of dinosaurs. That didn't last long though because the current bionics exhibit was pretty neat, too.

Rabbits. No, those were not bionic rabbits.
This was an exhibit about how life has changed
in the area we live in. I think. Anyhow, they
were begging to be photographed.

an Eiffel tower!

lots to explore. Again goes to show that my
kids have gotten used to iPads - it took
them a while to figure out you have to tap on a button
and can't just sweep...

This was really neat - it's bubbles, but it's a cube and the bubbles
it makes are neither round nor a cube, they pull to the inside
and create a minimal shape. 

learning about streamlined wings

a fish!

this was the best part: interactive goldfish.
When you try to catch them, they disappear.
Once the "water" gets still again (the kids get
off the area), they return.

It could have kept them entertained for hours!

gotcha!

a bionic car!

it's modeled after this fish.

I was really surprised at all the interactive features they had. When I was little, natural history museums featured mostly exhibits like those rabbits and you weren't allowed to touch anything. This was different and really nice, although I did find the combination of exhibits (Evolution of the area we live in, Bionics and Animals in the Bible) a bit, uhm, random. Oh well. 

Looks like I need to update my list of family trips (anyone surprised when I say I have a list of destinations to go and a binder that has leaflets and printouts organized by category?) to include more museums! I'd love to take them to art and photography exhibits. Actually, I'd love to go see a photography exhibit, with our without kids. I can't even remember when I saw the last one. I also need to make plans to do the more crowded destinations during the week, once big brother starts school in summer we won't be able to just take a day off and spend it on a family trip.

Little brother fell asleep on the way home and even big brother was pretty silent, apparently processing all the new information. It was a really nice weekend actually. Would love to do these things more often! 
So what did you guys do?

Cheers,
Swenja